Drawing hands can be an intimidating task for many aspiring artists. It’s a skill that requires both knowledge of anatomy and practice to master. But with the right techniques and tips, you can learn how to draw hands confidently and accurately. In this article, we’ll cover everything you need to know about drawing hands, from basic anatomy and motion to simplified diagrams of the hand structure. We’ll also share some useful tips on how to draw different types of poses so that you can create realistic-looking drawings every time! With these tools in your arsenal, you’re sure to be well on your way towards becoming a pro at drawing hands!
An Uncomplicated Guide to Hand Anatomy & Motion
The wrist bones, comprising of the radius and ulna located on your forearm, enable effective movement of your hand. Flexion-extension aids in this by allowing bending back and forth as well as tilting to both sides for increased motion range.
Nonetheless, it is not just about flexibility – pronation (palm facing downwards) and supination (palm turned upwards) are achieved due to a rotation that occurs at the elbow joint rather than the wrist itself.
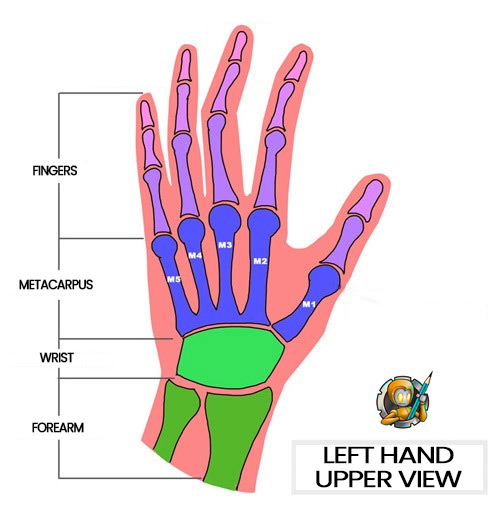
The foremost misstep for a newcomer is failing to consider the wrist’s bone structure. On our wrists, five metacarpal bones attach to form our digits: firstly, with the thumb; secondly, with the index finger; thirdly, connecting to the middle finger; fourthly associated with the ring finger and last but not least bonded with pinky. All of this points towards one mistake made all too often by beginners – neglecting these essential characteristics of their anatomy.
The last four metacarpals are much more rigid than the first, yet still form an essential arch that brings life to a hand. To truly make your hands come alive in art, don’t be afraid to exaggerate the curvature of their palms.
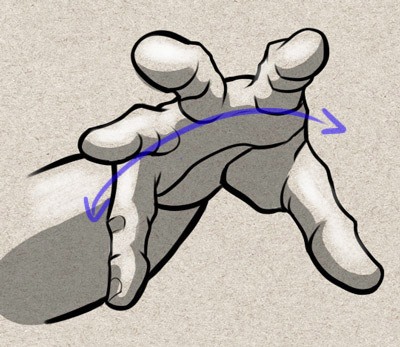
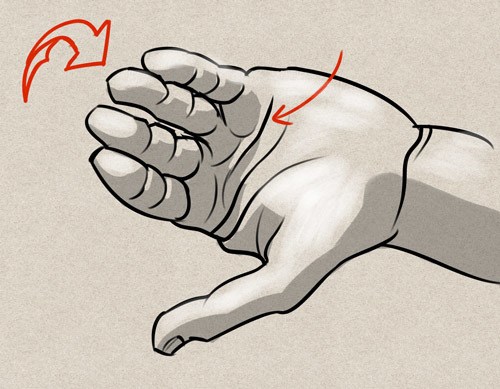
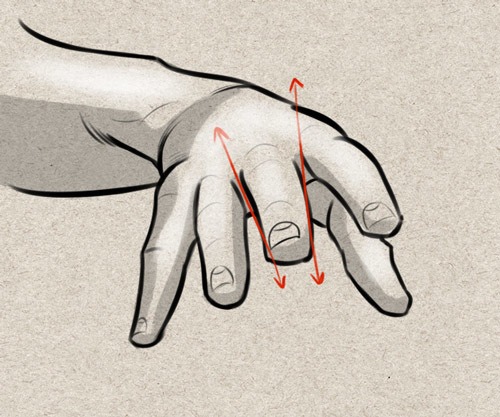
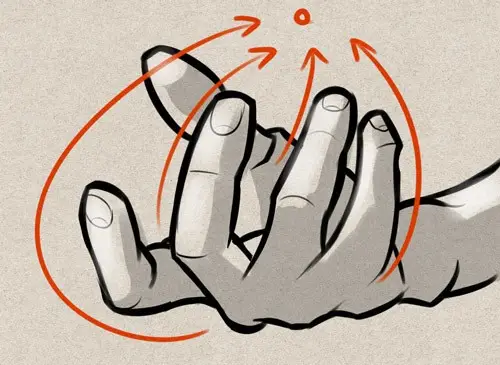
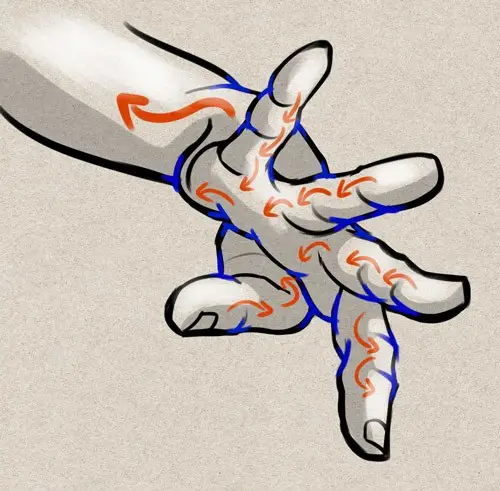
When an object is held with the entire palm, it naturally forms an arch-like shape. One must take into account this slight rotation of the fingers when drawing them in order to achieve a realistic perspective.
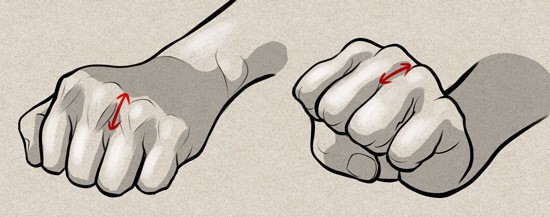
Gaze upon the fingers and take note of their rotation. The colored lines on top signify a subtle shift in each digit’s position, with more pronounced movement as you explore further into the palm.
The first phalanges of each finger rest upon the rounded heads of the metacarpals, permitting them to glide forwards and sideways (but not including the thumb which just folds in or out). Note that while all fingers have this ability, it is more pronounced with regard to index and little fingers due their larger lateral range.
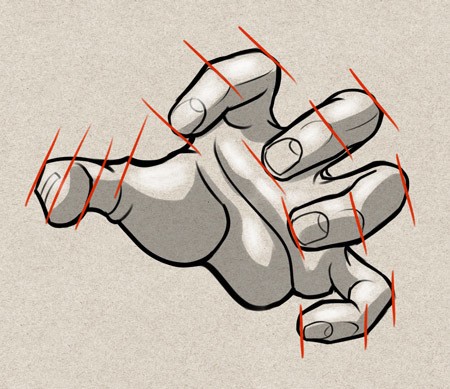
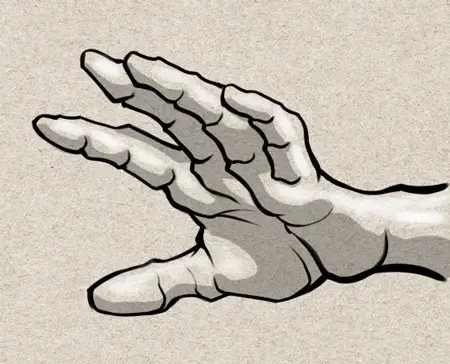
Unseasoned designers often overlook a crucial detail: the heads of the metacarpals. If these are not taken into account, it results in fingers that appear too long proportionally to their palms and thin base phalanges. Nevertheless, certain artists (e.g., comic book artist) sometimes opt to exaggerate this anatomical feature for stylistic purposes.
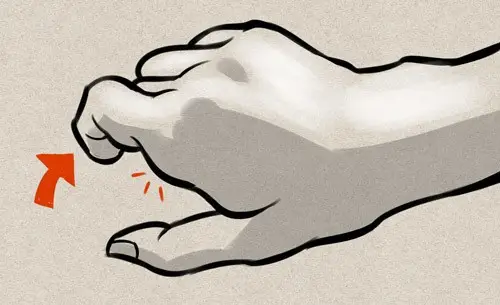
By clenchig your hand into a fist, you can efficiently measure the height of the head of your metacarpals.
Paying attention to the heads of the metacarpals is essential no matter what the position of your fingers is.
After all, we are each in this battle together!
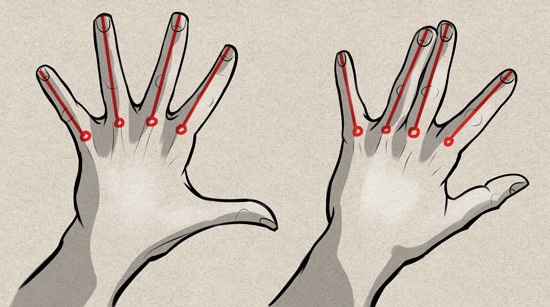
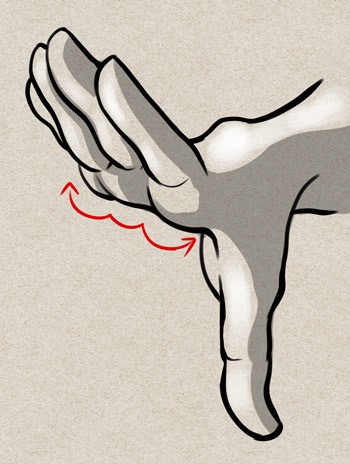
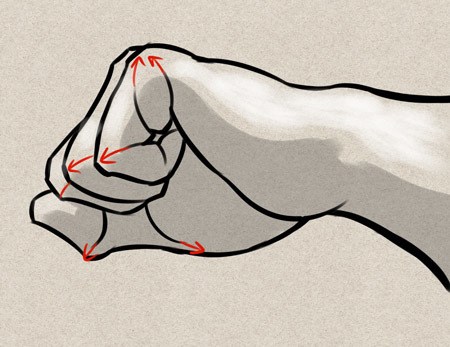
Reflect on how the heads of your first four metacarpals contribute to the formation of your initial palm fold. Observe closely at the inner part of your hand, and you will notice that there is an equal distance between this first crease and base of each finger which coincides with its corresponding phalanx length.
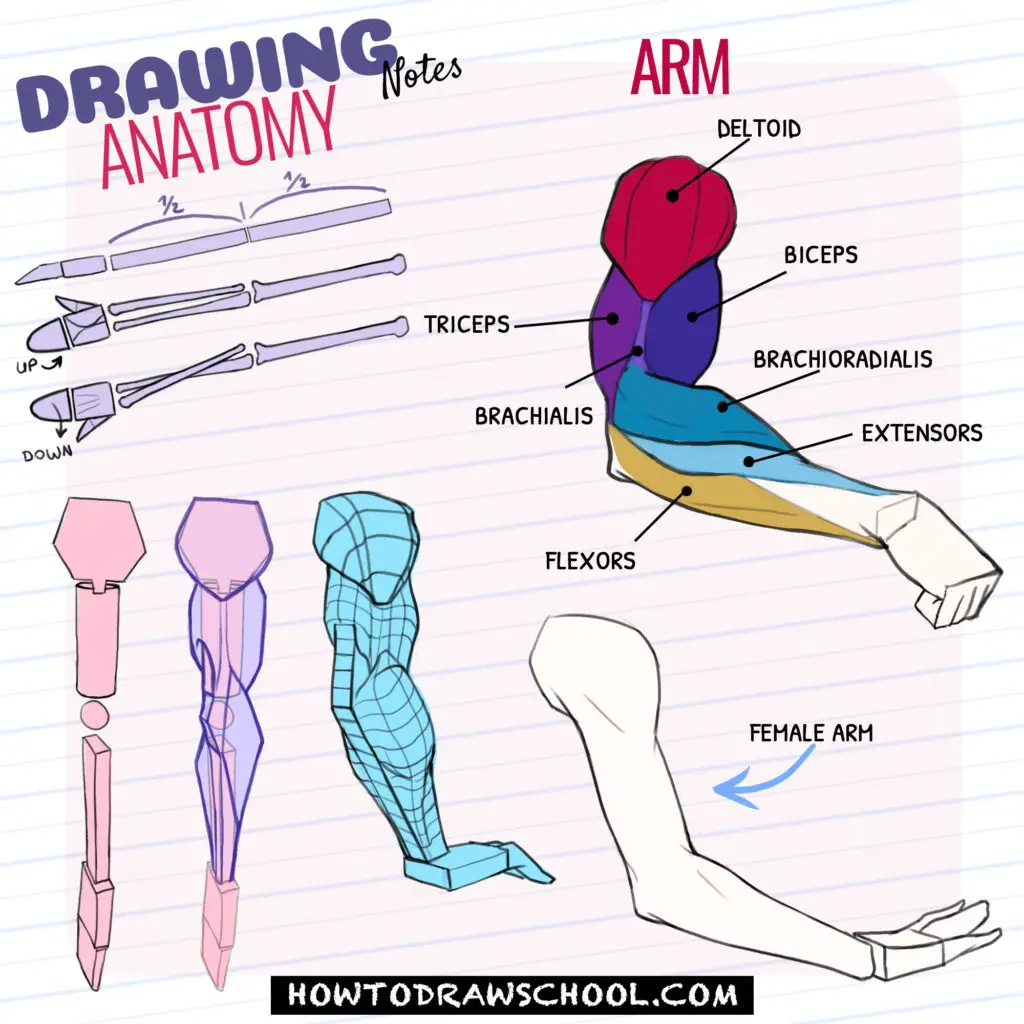
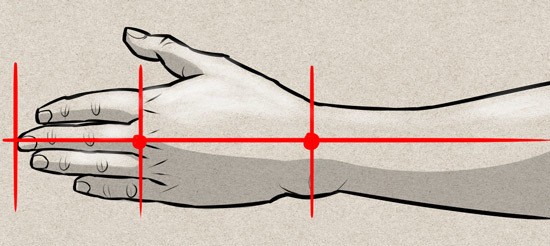
Keep in mind that the arm and forearm’s axis runs precisely through the center of your wrist, 3rd metacarpal (M3), and middle finger as depicted below.
Drawing the fingers (not the easiest)
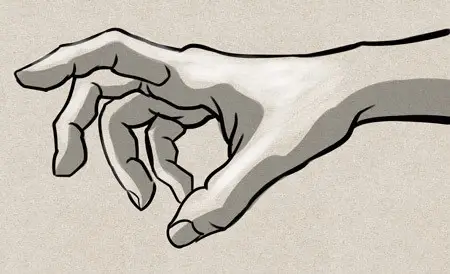
In contrast to the other digits, which each contain three phalanges, a thumb only consists of two. It is common for inexperienced illustrators to mistakenly identify the 1st metacarpal as the first phalanx of a thumb due its increased mobility compared to other bones in this region. However it can be distinguished from being an actual phalanx by observing that it directly connects with another bone – namely M2 or 2nd Metacarpal.
To make life simpler while sketching hands, remember to draw the palm first and save M1 and the thumb for last! This way, you can easily follow along with your palm drawing when adding in M1. When it comes time to incorporate a thumb into your hand sketch, you’ll already have a good idea of where it should go due to having drawn out its neighboring features previously. In other words: Draw the Palm > Add in M1 > Sketch Thumb – easy as that!
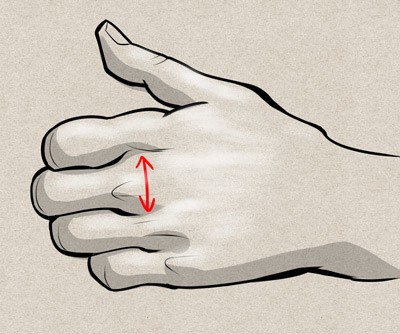
When you look closely, the middle finger is not much longer than the index and ring fingers. The trick to giving an illusion of unequal length lies in lengthening M3 more than M2 and M4; so don’t focus on making your middle finger disproportionately long – adjust metacarpal lengths instead for a natural-looking hand. As for thickness, remember that as we move towards smaller phalanges, joints become thinner.
From afar, one might assume that the end of the finger appears larger than its base due to our visibility angle; however, this is not true. To appreciate this illusion reversal in action, it would require either a specialized magnifying tool or positioning your eye close to the fingertip itself.
With the first and last two phalanges of a finger being almost equal in length, it’s no surprise that our hands are able to naturally hold objects without any discomfort. Nature has brilliantly cushioned our palms with fatty tissue so as not to cause skin-pinching when grasping something between hard surfaces.
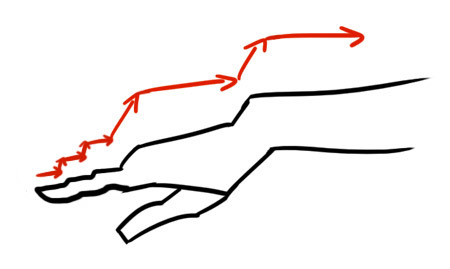
To create a more lifelike representation of the hand, focus on the staircase-like structure formed by the metacarpus and wrist. Some cartoonists take advantage of this concept to amplify their illustrations with great success.
As you look at your fingers folding, pay attention to which way the skin’s creases go. Every joint except for that on the first phalanx shows a fold going up toward its tip.
The same occurrence can be observed from the other perspective.
The Thumb (the most mobile)
Although the thumb has fewer phalanges than the other fingers, it is functionally similar to them in that they can bend and unfold similarly. What truly sets it apart from its counterparts is its remarkable mobility of M1 or first metacarpophalangeal joint.
This distinctive movement allows us to perform a variety of tasks such as grasping objects securely with our hand.
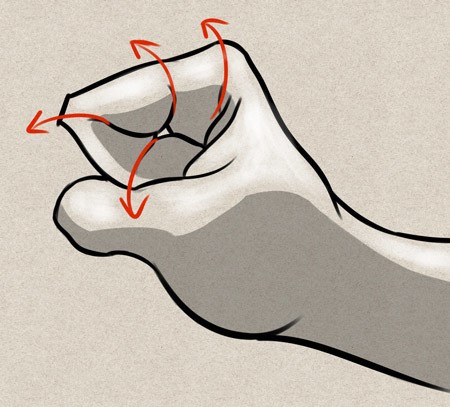
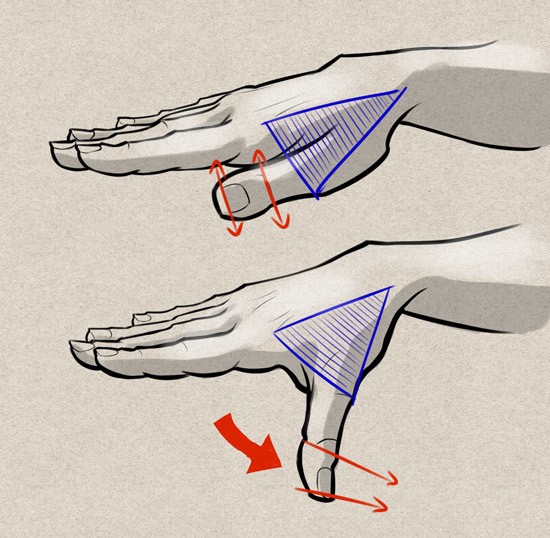
The remarkable mobility of the thumb is due to its connection with the first metacarpal. This triangular plane formed by M1 and M2 changes depending on where the first metacarpal is positioned – when it moves away from your hand in a forward direction, it rotates almost 90° which allows for opposition movement of the thumb itself.
To better understand this concept, put your thumb tip up against that of your pinky finger; you’ll notice how they face each other despite being at opposite ends!
Notice the remarkable contrast in movement between the thumb and little finger, with their last phalanges facing one another.
To observe the movements of your thumb and fingers, visualize a straight line drawn perpendicular to each finger at its interphalangeal joint (the area where skin creases).
Additionally, if these imaginary lines are not parallel on the same finger, it is likely that your finger may become dislocated. Ensure your phalanges are correctly aligned relative to one another on the same finger.
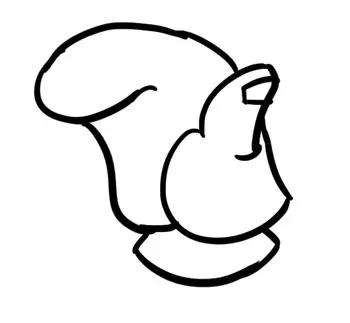
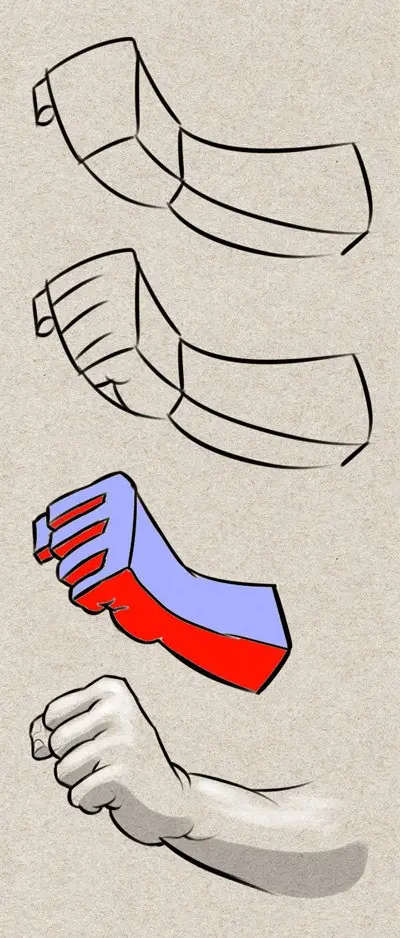
The mitten technique
I’m a firm believer in simplicity – it’s always best to start with the basics. Drawing a mitt is much easier than drawing an entire hand, as it gives you an overall view of the hand block without having to go into detail about each finger.
Drawing a mitten is an excellent visual aid for learning how to correctly position the hand in space. Bend your fingers into a block like you would with any other glove-shaped object and, presto! You have an easy way to illustrate finger bends.
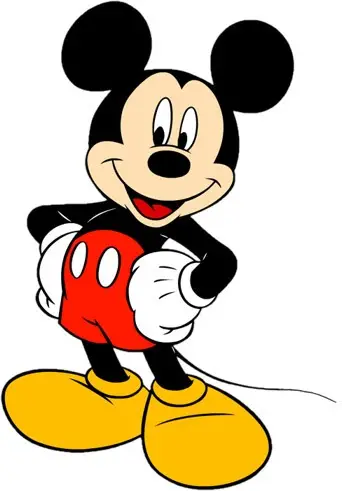
Additionally, drawing hands with mittens slipped onto forearms will save you time because it eliminates the need to focus on each individual finger or worry about wrist bends too much. That’s why I use this technique when illustrating Océ – isn’t it amazing?
What could be the reason behind our beloved rodent friend donning wrist gloves? It’s unlikely to just be for fashion purposes…
For a successful drawing experience, let us begin by sketching out an outline of the glove or hand with three to four fingers all of equal length. This way we are not overpowered by details on size and can apply perspective instead while still creating a professional-looking piece.
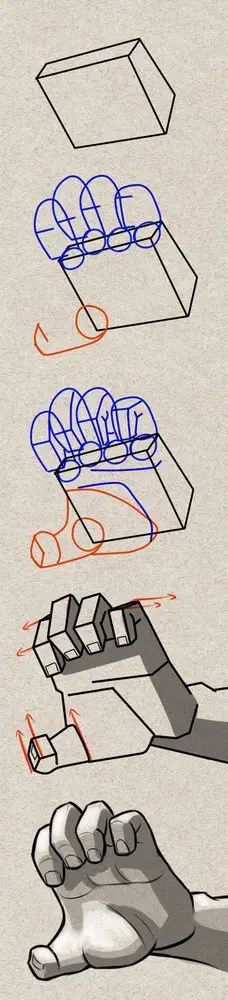
The mechanical hand
Once you understand the basics, then it’s time to really hone in on your wrist, hand and finger movement. It’s essential not to overlook the lateral planes – a common misstep amongst new draftsmen.
The planes of the hand and fingers, rendered in vibrant colors. These are essential elements to ensure a sense of perspective, depth, and realistic 3D effect when creating an image or sculpture of a human hand. Without these details added in precise hues, there would be no dimensional illusion at all!
The planes of the hand and fingers, rendered in vibrant colors. These are essential elements to ensure a sense of perspective, depth, and realistic 3D effect when creating an image or sculpture of a human hand. Without these details added in precise hues, there would be no dimensional illusion at all!
Here are the steps I highly recommend to draw a mechanical hand that will help you avoid getting lost in space: Start by sketching out the back of your fingers before tackling drawing the palmar side.
Draw a realist hand, step by step
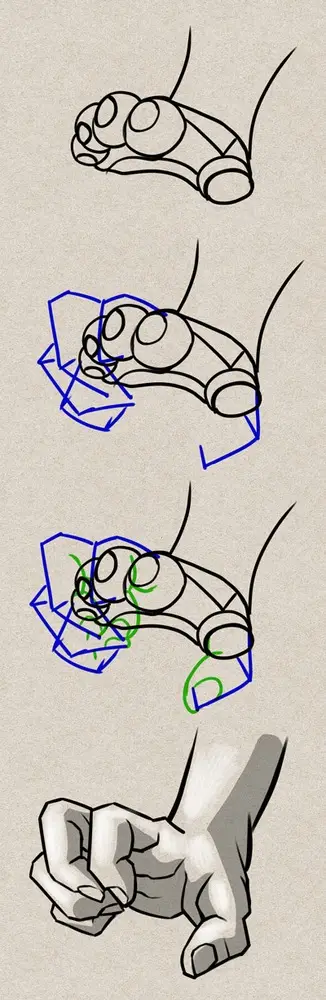
To draw a hand, I typically start with creating a block for the palm which is larger towards M3 and curved across its width to bear in mind the arch that’s formed by the metacarpals.
Then, I hurriedly form circles of the head of each metacarpal followed by drawing an outline of each finger – quickly establishing their direction (rhythm) and length.
Subsequently, I sketch the back of each interphalangeal joint for an understanding of the angle and positioning of every finger – a step that is critically imperative! Now all I must do is refine my drawing by sharpening its outer lines and refining any shortcuts taken.
Drawing the shortcuts of the hand and fingers
If you ever wish to illustrate complex perspectives, then shortcuts are your utmost necessity. I know some of y’all may be screaming “No way! Don’t take shortcuts!” Hold on friends – if we proceed step by step, we can figure it out.
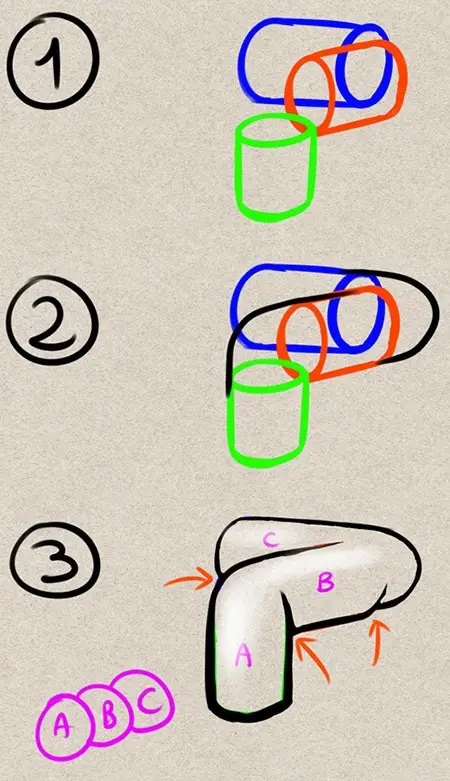
The key is to begin by simplifying the picture into basic shapes and connecting them afterward. Here’s an example demonstrating how a hand can easily be simplified first before being shortened.
Drawing hands can be a difficult and time-consuming task, even with shortcuts. Don’t expect to perfect it in a day, week or month! The best approach is to observe your own hand as needed and practice simple shapes like “pipes” or interconnected cylinders until they become second nature.
It may take several years of dedication before you’re able to effortlessly draw natural-looking hands without having to think too much about the technique involved – but keep at it and you’ll get there eventually!
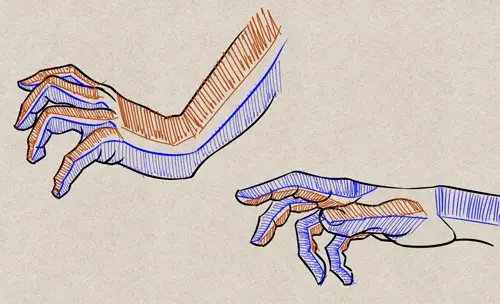
Rythms of the hand
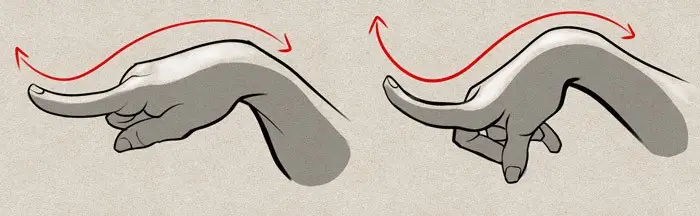
We can reduce the hand’s curves to a few basic strokes just as we do with the entire human body. To create an expressive design, it is necessary to exaggerate these curves. Below are some examples of exaggerated natural rhythms that prove this concept.
Allow yourself to flow seamlessly with the natural rhythms of your hand, keeping your fingers slightly bent and relaxed.
The same occurrence can be observed from the other perspective.
miscellaneous advices
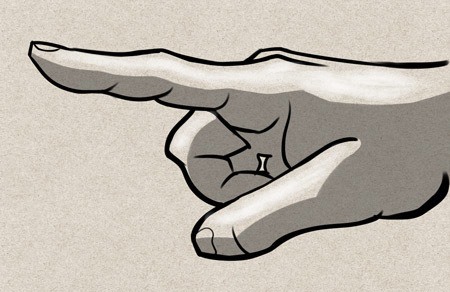
Leaning the index finger against the middle one and accentuating M2’s head imbues more expression to your hand.
Emphasizing extreme hand positions can evoke powerful expressions – so much like in character drawing, the more exaggerated the movement is, the more expressive it will appear.
Don’t be shy with extending your first phalanges relative to metacarpals; this kind of motion gives off an impression that you have precision and proficiency. Moreover, these kinds of postures even lend a certain delicacy to your hands.
Notice how the first interphalangeal joint appears firmer than the second when looking at it side-on. If you exaggerate the natural angles of your finger joints while stretching, this will systematically add power to your grip.
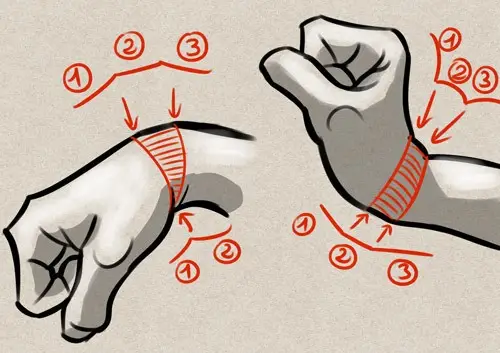
The ulna boasts an incredible ability to bend the hand much more than its radius counterpart, not only providing stability for your wrist but also adding a layer of expressiveness to the overall movement.
When the wrist is bent and extended, two corners form on top of the joint due to its underlying bones. This detail shouldn’t be overlooked; it’s why many cartoon characters wear gloves—to avoid having to draw this intricate design! As I mentioned earlier, these details can quickly become quite complicated when putting them together in a drawing.
By viewing the outstretched hand from a peripheral view, you will catch sight of only two digits: the index and middle fingers. An alternate perspective allows one to observe all five appendages extending outwardly.
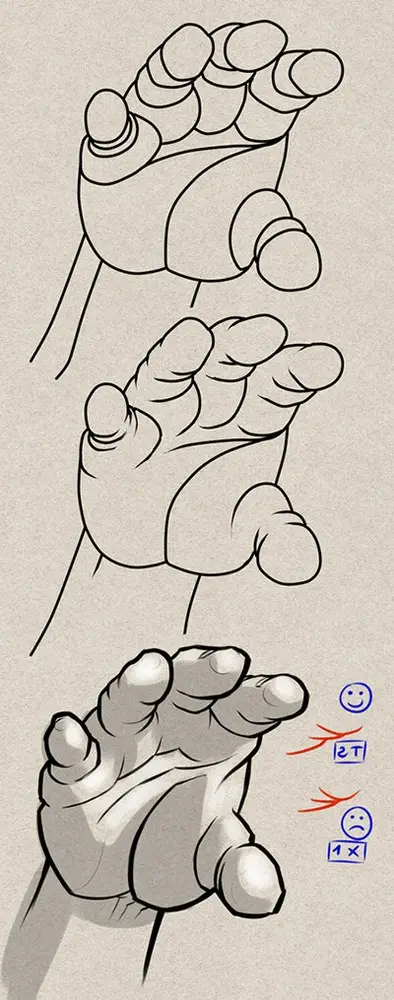
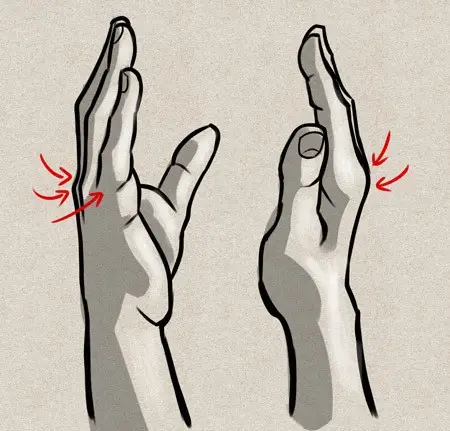
Don’t forget to pay attention to the distance between your fingers. If they are too close together, it will create an unnatural look. To fix this, make sure to emphasize the contrast in volume between each knuckle and its base joint on each finger.
There is no point in painstakingly drawing every crease and wrinkle of the hand or fingers; it’s wise to go for the basics, especially if you don’t plan on adding any values later. Drawing a hand with too many folds can be likened to depicting a face with too much wrinkling – there is absolutely no need for it, and your artwork will become unnecessarily aging.
To create a shortcut, you must demonstrate the relationship between two shapes by illustrating how they are connected. By positioning your “T”s in a certain way, it’s possible to emphasize this link and show that there is not an absolute break between them.
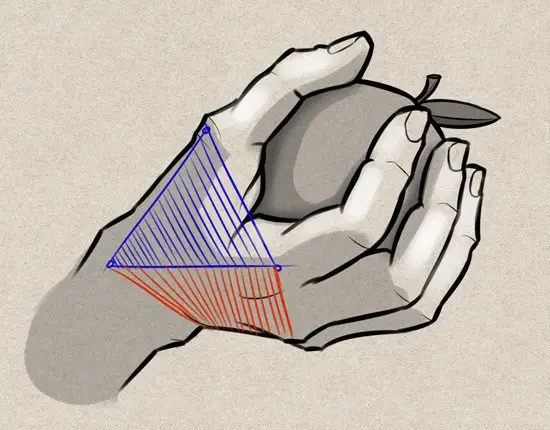
It’s discernible that the M2 and M1 fingers on the back of your hand form a triangular surface which is influenced by both opposition degree and thumb distance.
This triangle can be seen as an extension to the lateral radius plane of your wrist, producing variations in shape and angle.
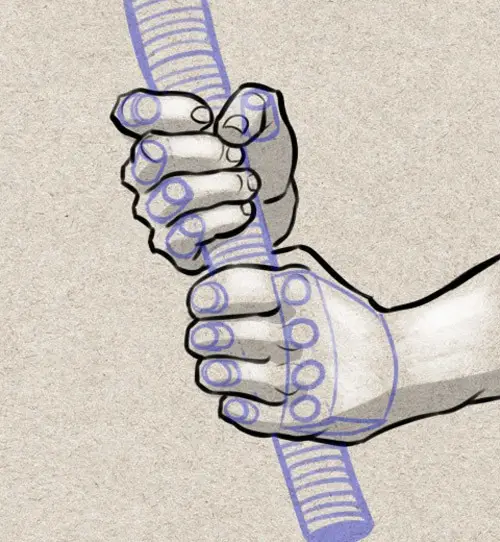
When sketching an object that is being held by a hand, it is best to begin with the subject itself and then draw the hands around it. Position your wrists, forearms and arms as needed before completing the drawing with shoulders for total accuracy in movement.
If your drawing involves a large object, be sure to consider the thickness of the fingers and metacarpals when depicting how tightly it is held. Otherwise, there may appear to be an unrealistic gap between the hand and object that detracts from its credibility.
To round out your hand sketch, you can exaggerate the depression of the nail matrix at the end of each finger. This will add an extra “stair step” to your drawing and create a look that is pleasingly dynamic. When striving for realism, don’t be afraid to make angles sharper or curves more pronounced than what nature offers—achieving balance between mechanical accuracy and creative expression is key!
Pay attention to all other details already mentioned in this piece as well; these are crucial elements for giving life-like characterizations to your artwork.
POINTS TO REMEMBER
Construct the palm first, always. It will show the global perspective of the hand. Only then, draw the fingers.
The thumb is the naughtiest because it’s really mobile. Consider the triangle plane as we saw before.
The mechanical hand is the best technique to master the perspective drawing of the hand.
Discover the secrets of one of the best professional illustrators
Unlock your artistic potential with our comprehensive video course on illustration! Whether you’re a beginner or an experienced artist, enroll today and start bringing your illustrations to life!